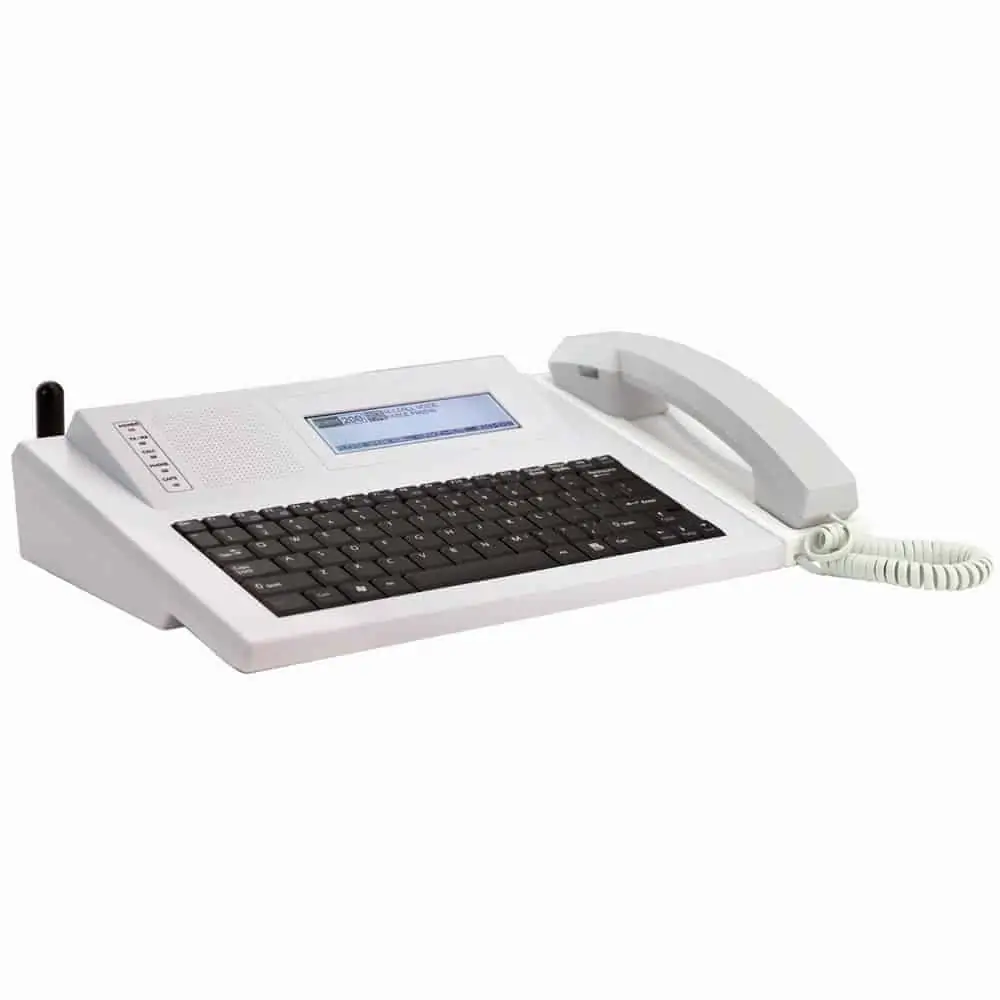
VS4820 Demo System – Quick Startup
System Setup
1. Connect the unit to power and the handset microphone to the handset port. Connect the antenna with the magnetic base to the RF-OUT port on the back of the unit. Place the antenna vertically on an elevated surface at least 5 feet away from the VS4820. If you have intercoms or wireless CT buttons, you’ll have a smaller antenna connected to the RF-IN port.
2. If you have a VS101 external transmitter, connect it to the VS4820 with the provided data cable to the EXT. TX port and connect the VS101 to power. The antenna will then plug into the RF-OUT port on the back of the transmitter. If you’re using the magnetic mount antenna, you’ll have an adaptor that will fit on the RF-OUT port. If you have intercoms, a receive antenna will also be used and connect to the back of the VS101 on the Rx Port. Antennas should be located towards the center of the building for the best coverage and separated from the base station and transmitter by at least 5 feet.
Wireless Panic Button Activation and Pre-Programmed Events
The VS4820 wireless paging base station uses events to activate speakers, strobe lights, message boards, intercoms, pagers and more. The system will be pre-programmed and ready to use for basic operation. You can select from the list of events already programmed into the base station by pressing F1, or enter them manually on the keyboard from the main menu screen.
Wireless PA Speaker:
200: AllCall Voice. Activates all speakers for live PA.
a. Activates all speakers, and after a short delay will show “Please speak now” on the bottom of the screen.
b. Hold the PTT (Push to Talk) button on the microphone while speaking. Press Esc to end voice paging.
Tone/Voice/Bell Alert:
300: AllCall Tone. Plays a test tone over all speakers.
301-303: Lockdown, Evacuation, and Clear messages. Plays a pre-recorded emergency message.
Alphanumeric LED Message Board:
400: AllCall Displays. Sends text to display on all signboards. When activated, a message screen will come up. Type the message to send to the signboards, and press ENTER to send.
401-402: Lockdown and Evacuation LED. Automatically displays a pre-programmed emergency message on signboards.
499: Clear LED. Clears messages on all signboards.
Two-Way Intercom Station:
501–502: 24xx intercoms. Initiates a two-way communication with an intercom.
a. When activated, this will call the intercom. Once the intercom answers the call, it will show “intercom station on”.
b. Press and hold the PTT button on the microphone when speaking to the intercom unit. Press Esc to end the call.
c. When speaking into the intercom to the VS4820 hold the call button down on the intercom. Cancel to end the call.
Wireless Beacon Light (Strobes):
600: Strobe Manual. Allows custom light activation. Press the F1 and F2 keys to change mode (pattern) and color. Press Enter to activate the lights.
601-603: Amber, Red, Green lights. Automatically activates lights with pre-programmed settings.
Corridor/Dome Lights (VNS2710):
700: AllCall C.Lights. Allows custom activation of the VNS2710 light panels.
a. Press the F1-F3 keys to edit, and press Enter to send the activation.
b. F1 will change which lenses activate, F2 changes the pattern or mode, and F3 will change the color.
Multimedia and Sequential Event Groups:
901-903: Lockdown, Evacuation, and Clear Sequence. Activates multiple events.
Digital Pager:
100: Sends an alphanumeric message to a pager or other device. When activated, a message screen will come up. Type the message to send to the pagers, and press ENTER to send.
Events Activation Sources
Events can be triggered by multiple sources, including wireless CT Panic Buttons and dry contact alarm inputs. You can also use the phone line interface or SMS messaging if the unit was purchased with these options.
You can edit or program new events in the setup menu by pressing F9 from the main menu, and selecting option 01 for ADD/EDIT EVENT. The default password is PASSWORD. Please see the full VS4820 manual on the resources page at www.Visiplex.com for additional assistance, or contact technical support.
Multimedia and Sequential Event Groups:
1. Connect the VS4820 to an ANALOG PHONE LINE in the PHONE port. The system is not compatible with digital or VoIP phone lines. (Requires VS3003 Telephone Line Interface option.)
2. Dial the number or extension of the connected line on your phone, and it will prompt you to enter an event number. Enter event 200 on your keypad for live audio from your phone to all speakers, or any event number you want to activate.
With the SMS Messaging option, the VS4820 can send text messages to your cell phone. You can also activate events using the Visiplex Remote Access App available for download on your device. (Requires VS3031 LTE Modem option.) See the full VS4820 user manual on the resource page at www.Visiplex.com for help with using this feature, or contact tech support for further assistance.
